Avo has a notion of panels to define the layout and behavior of the specific resources.
For instance, it is easy to define a panel for the User resource that includes the id, email, and name fields.
class Avo::Resources::User < Avo::BaseResource
  def fields
    field :id, as: :id, link_to_record: true
    field :email, as: :text, required: true
    field :name, as: :text, required: true
  end
end
Once the resource is defined, Avo automatically generates the user interface to manage the User resource.
It creates a table view to list all users, a form to create and edit users, and a detail view to show the user details.
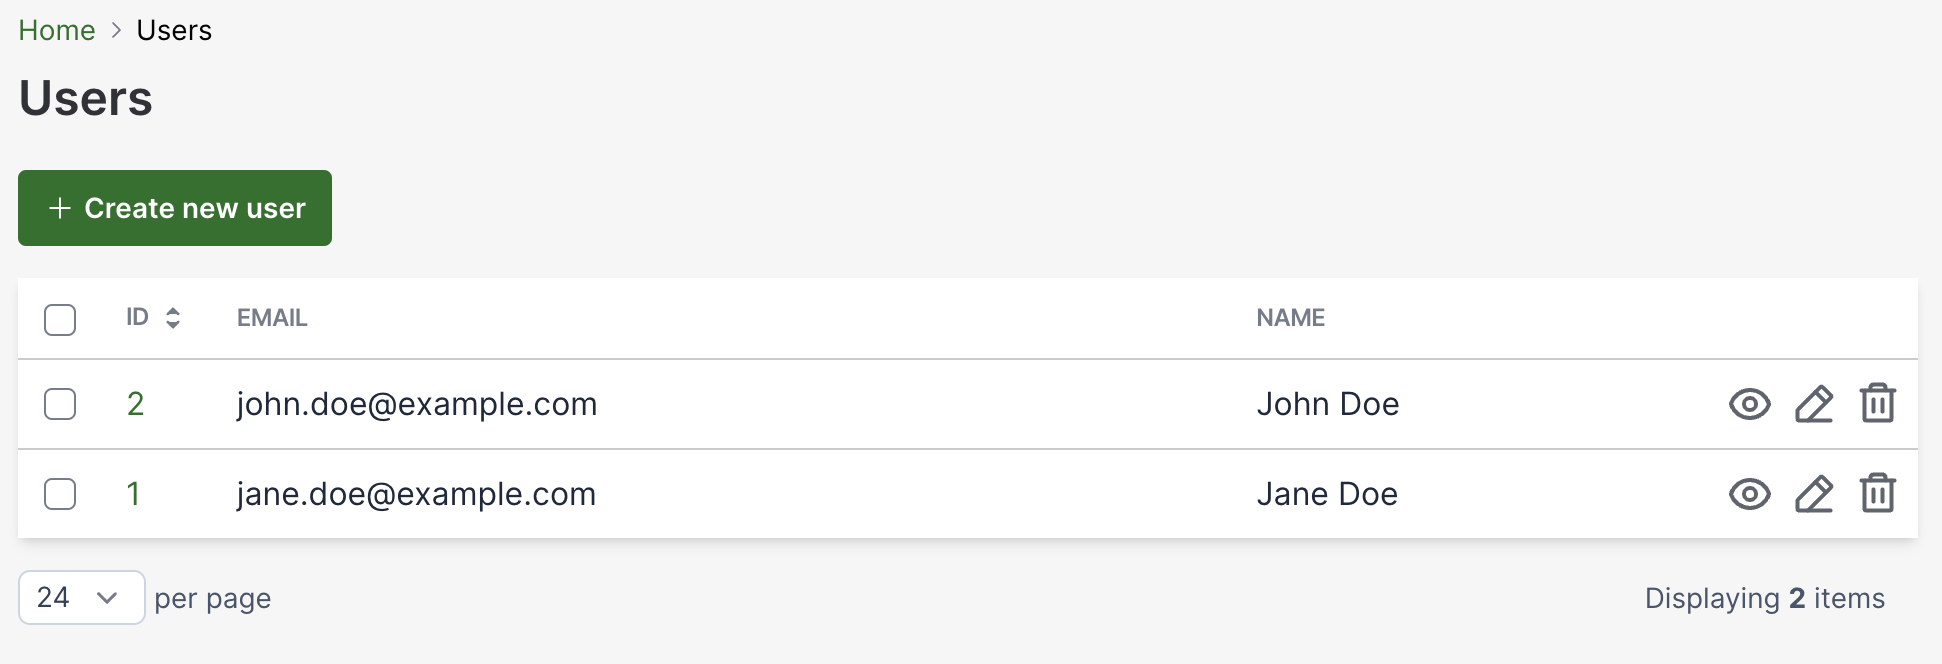
The key role here is played by the fields method, which defines the fields that are displayed in the user interface.
In many cases, the default field types provided by Avo are sufficient to cover the needs of the application.
However, there are cases where custom fields are required to meet specific requirements.
In this post, we will explore how to create custom fields in Avo.
Out example is going to be quite simple, but it will give you a good understanding of how to create custom fields in Avo.
Copyable text field
Let’s implement an example of a copyable text field. This field type is useful when you want to display a text value that can be easily copied to the clipboard. It must looks like a default text field but with a copy button next to it. Obviously, the button should be displayed only on “Show” view since it doesn’t make sense to copy the value in the “Edit”/”Update” views.
In order to create a custom field in Avo we can use a scaffold generator that will create the necessary files for us.
$ rails generate avo:field copyable_text --field_template text
Avo pro 3.6.1
      create  app/components/avo/fields/copyable_text_field
      create  app/components/avo/fields/copyable_text_field/edit_component.html.erb
      create  app/components/avo/fields/copyable_text_field/edit_component.rb
      create  app/components/avo/fields/copyable_text_field/index_component.html.erb
      create  app/components/avo/fields/copyable_text_field/index_component.rb
      create  app/components/avo/fields/copyable_text_field/show_component.html.erb
      create  app/components/avo/fields/copyable_text_field/show_component.rb
      create  app/avo/fields/copyable_text_field.rb
Since we would like to reuse the existing text field template, we can pass the text field template as an argument to the generator.
In this example, we generate a new field called copyable_text using text as a base template.
The generator creates the necessary files for the new field type, including the edit, index, and show components.
Since the only change is the addition of the copy button, we only need to modify the show_component.html.erb file.
<!-- app/components/avo/fields/text_copyable_field/show_component.html.erb -->

<%= field_wrapper(**field_wrapper_args) do %>
  <div
    data-controller='clipboard'
    class='flex flex-row items-center gap-2'>

    <span data-clipboard-target='source'> <%= @field.value %> </span>

    <button
      class='hidden'
      data-action='click->clipboard#copy'
      data-clipboard-target='copy'>
      <%= helpers.svg 'heroicons/outline/document-duplicate', class: 'h-5 my-1' %>
    </button>

    <div data-controller='tippy'>
      <span
        class='hidden'
        data-tippy-target='source'
        data-clipboard-target='done'>
        <%= helpers.svg('heroicons/outline/check', class: 'h-5 my-1') %>
      </span>
      <div class='hidden' data-tippy-target='content'>Copied!</div>
    </div>
  </div>
<% end %>
Here we display the actual value of the field and add a button that copies the value to the clipboard.
The button is actually just a SVG icon from Heroicons collection that looks like a copy icon.
As an addition, we use the tooltip to show the “Copied!” message when the value is copied and also change the icon to a checkmark.
The tippy controller is defined by the Avo itself so we don’t need to add it manually.
However, the clipboard is a custom Stimulus controller that we need to define in the JavaScript.
// app/javascript/controllers/clipboard_controller.js

import { Controller } from "@hotwired/stimulus";

const TOGGLE_TARGET_TIME = 3000;

export default class extends Controller {
  static targets = ["source", "copy", "done"];

  connect() {
    // show the copy target only if the clipboard API is supported
    if ("clipboard" in navigator) {
      this.showCopyTarget();
    }
  }

  copy(event) {
    event.preventDefault();
    navigator.clipboard.writeText(this.sourceTarget.innerText);

    this.showDoneTarget();

    setTimeout(() => this.showCopyTarget(), TOGGLE_TARGET_TIME);
  }

  showDoneTarget() {
    this.copyTarget.classList.add("hidden");
    this.doneTarget.classList.remove("hidden");
  }

  showCopyTarget() {
    this.doneTarget.classList.add("hidden");
    this.copyTarget.classList.remove("hidden");
  }
}
Here is a brief explanation of the code:
- We show the copy button only if the clipboard API is supported.
- When the copy button is clicked, we write source (the value of the field) to the clipboard.
- We show the done target (the “Copied!” message) and hide the copy target (the copy button).
- After 3 seconds, we show the copy target again.
That’s pretty much it, we just need to change the type of the field in the resource definition to use it:
def fields
  field :id, as: :id, link_to_record: true
- field :email, as: :text, required: true
+ field :email, as: :copyable_text, required: true
  field :name, as: :text, required: true
end
Now we are ready to check the results in the Avo interface:
Wrap-up
In this post, we have explored how to create custom fields in Avo. The example we have implemented is quite simple, but it demonstrates the process of creating a custom field in Avo. Avo allows you to create custom fields with a high flexibility, so the fields can be much more complex than the one we have implemented.
Follow the official guide to learn more about creating custom fields in Avo: Custom fields.
]]>